Save Development Time with Android Studios' File Templates

I enjoy all things Mobile and Software Engineering. I am currently a Software Engineer and Android Google Developer Expert based in Germany 🇩🇪 but from Kenya 🇰🇪, whose primary focus has been Mobile for the past 6 years.
I share my experiences, the good, the bad, the ugly, and sometimes random tech talks :)
I remember back in the days when I first worked with recycler views, took me a while to understand what in the world was going on😲. Eventually, I got the hang of it and couldn't wait for an opportunity to flex some brain muscle and write it out of memory😎, but with time this got monotonous and boring real quick and was eating into development time that could be used to tackle other tasks. ✅
So this is where File Templates come to play.
A file template basically lets us define a generic entity, could be a file, class, piece of code or whatever you need, containing a set of variables that will be replaced with the values you define on implementation of the template.
All you are doing is providing specifications on the format the default contents will be created.
For more on file templates check out the resources provided.
Getting Started
Note: At the time of writing I am using Android Studio 3.5
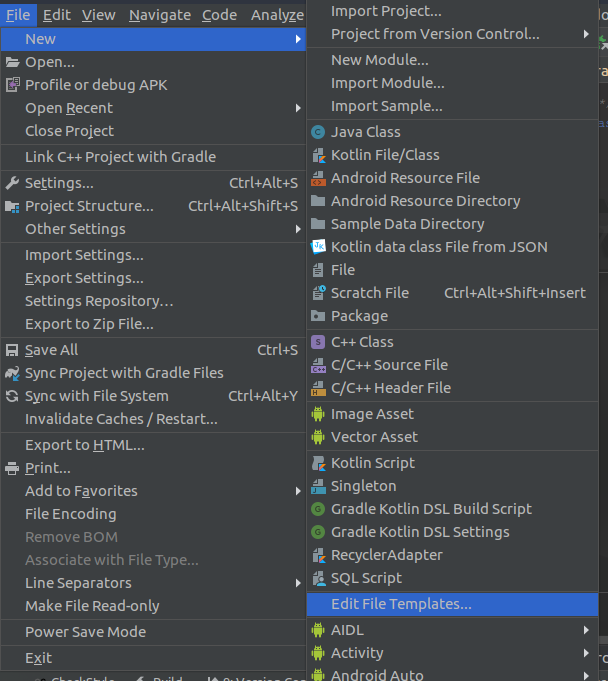
To Start head on to the FIle tab and highlight New from the dropdown, scroll all the way down to Edit File Templates
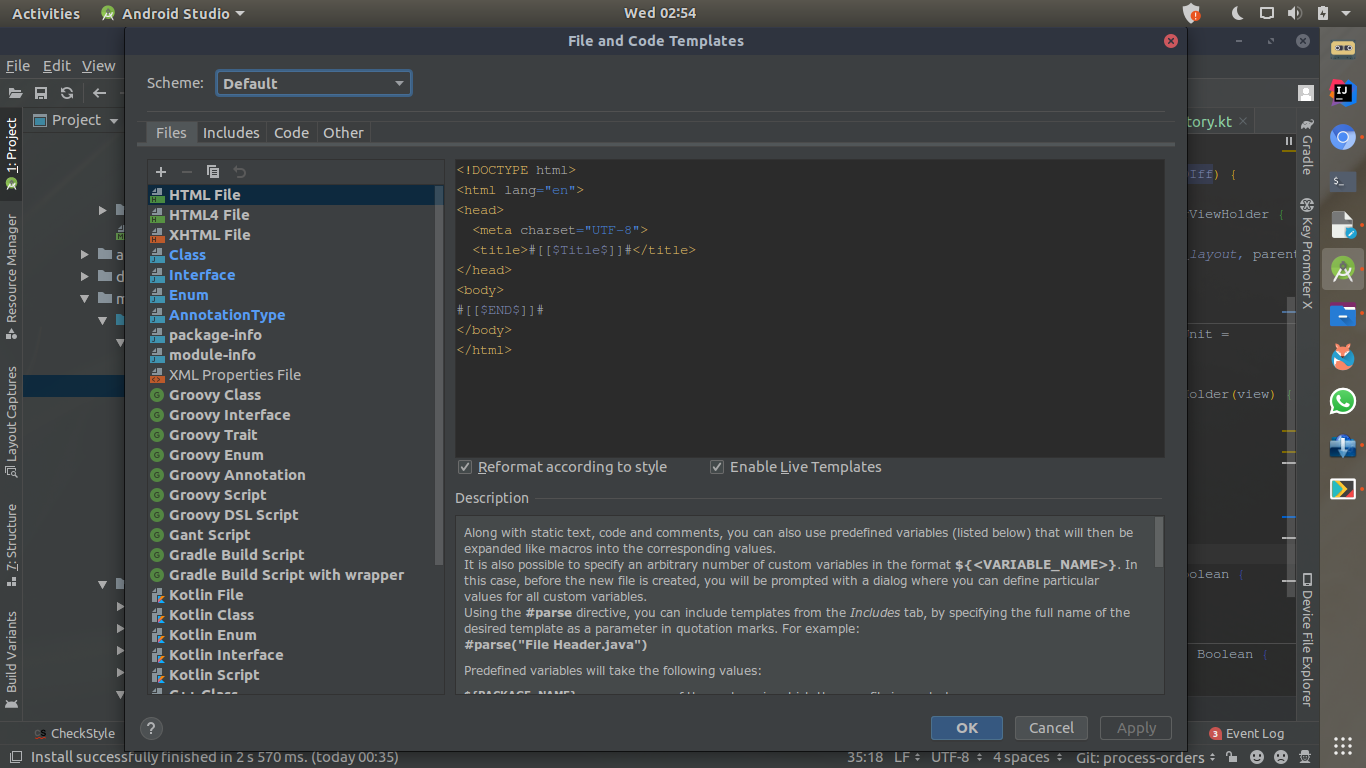
And this window will pop up showing you some of the templates which come with Android Studio
To write your own templates there is a format to which these variables are written with some being predefined based on some common use cases
As per the documentation
A variable is a string that starts with a dollar sign $ followed by the variable name. The variable name may optionally be enclosed in curly braces. For example $MyVariable and ${MyVariable} are different notations of the same variable.
To demonstrate this I'll use one of the predefined variables in the next section, just hold on to it at the back of your mind😁
File Header
There are instances where your files might need to have information attached at the beginning to each and every one of them, it could be copyright notices, licenses, timestamp, authors and so much more. And going around writing this to every file seems a little crazy once the project grows in terms of files.
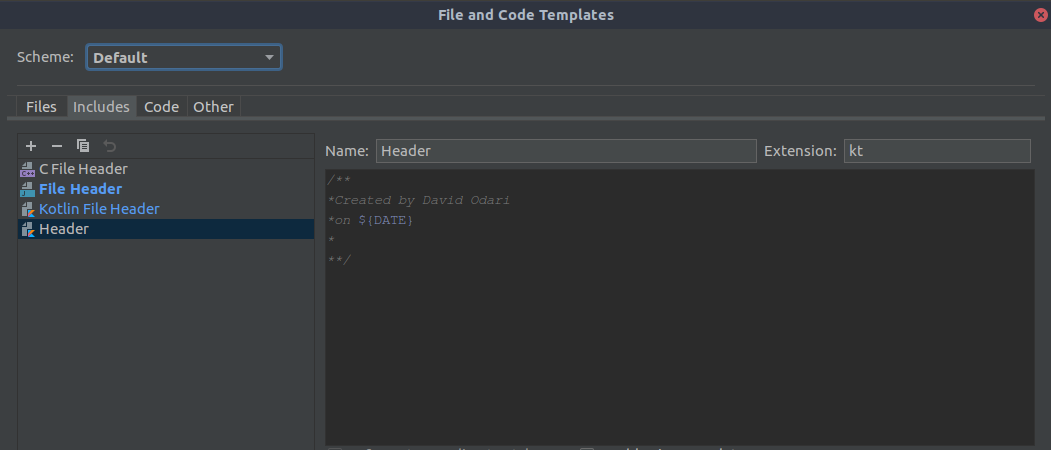
So on to the code, let's say I want to include my name and day I created the file on every file I create. There's a predefined variable for the current date so that has already been handled for us and going by what we said earlier it will be written as $DATE or ${DATE}
How to use it?
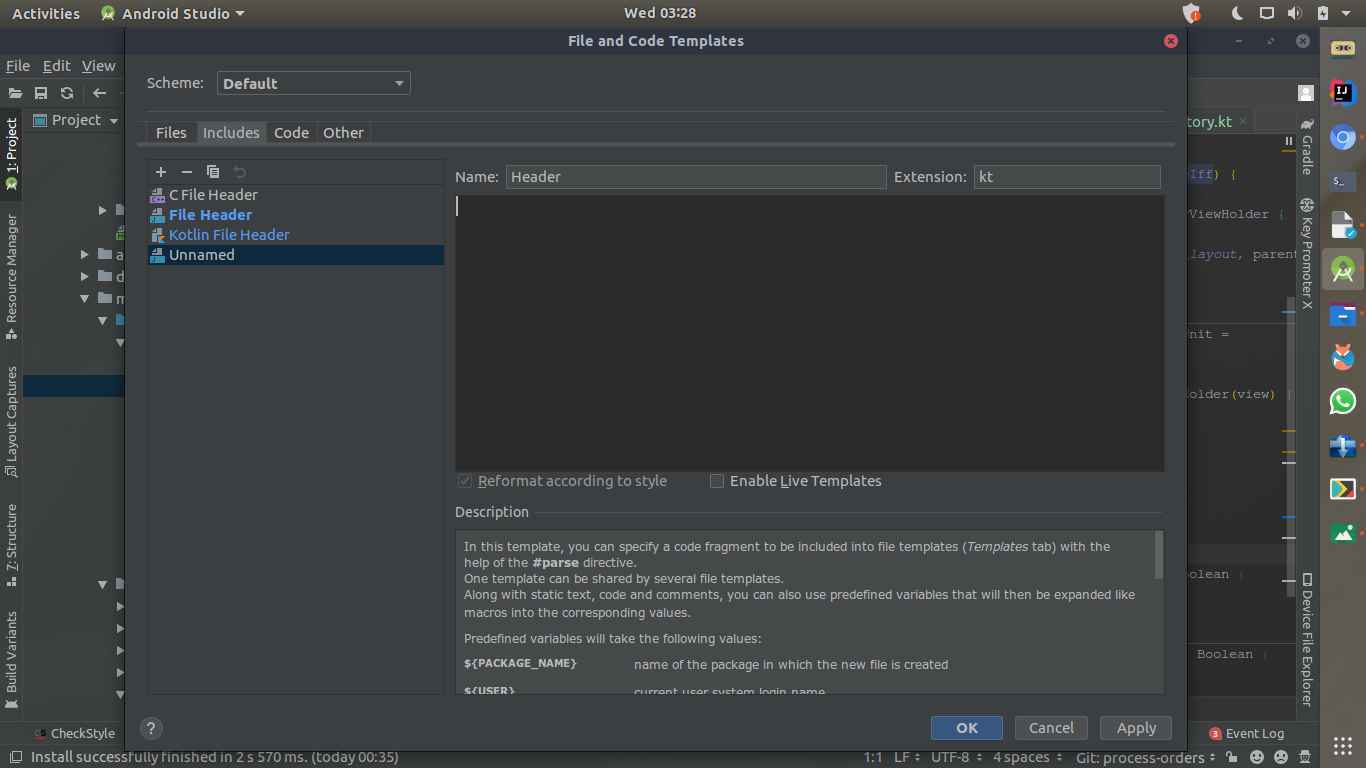
From the menu that popped up earlier with the default templates go under the includes tab, here is where you will add your header files by clicking on the + button, give your header a name and file extension, I will go with kt.
You can then add a simple comment this will be parsed and appended as a comment with a Date Variable as we shall see in the next section.
Template
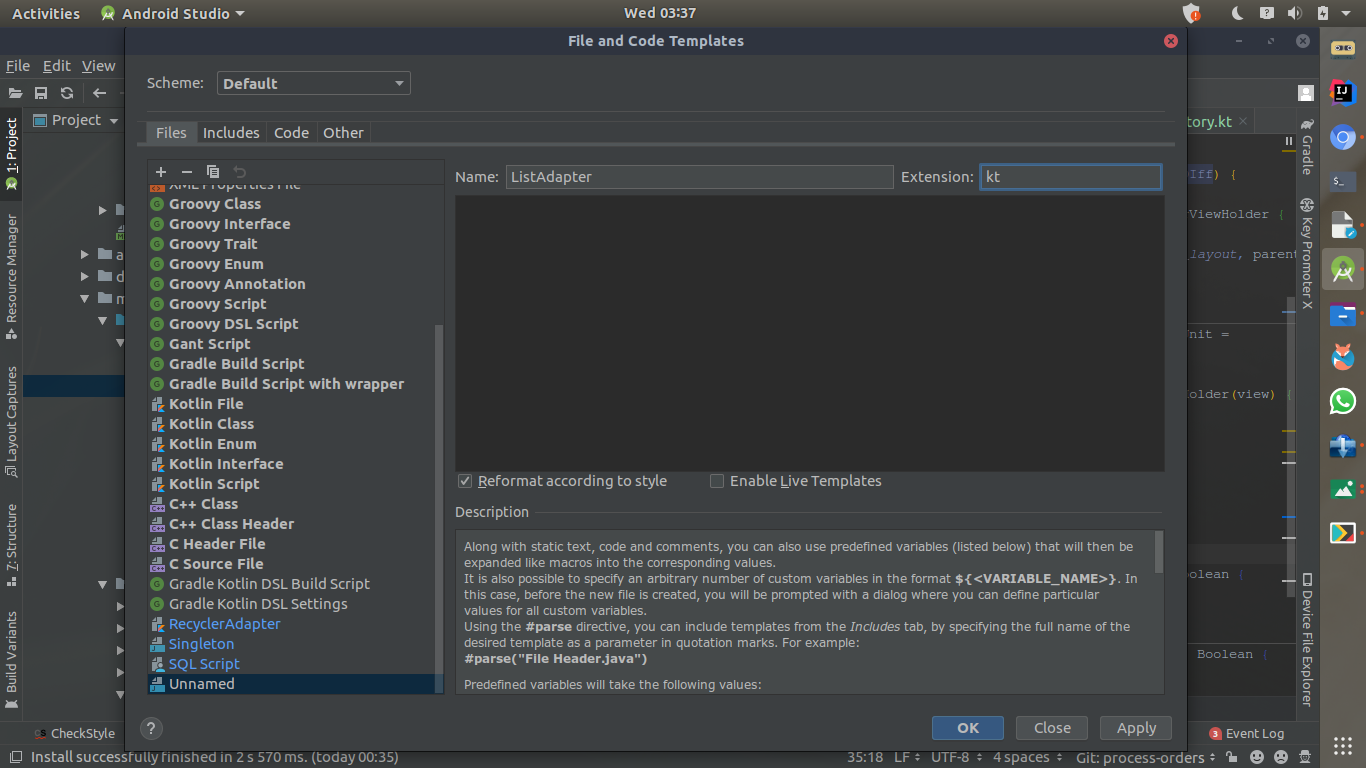
Alright then, off to serious business we will create a file template for a ListAdapter and append the header we created earlier.
First head back to the files tab under the pop up we were working with earlier and click on the + to begin editing your template, I'll name mine ListAdapter and give it a kt extension.
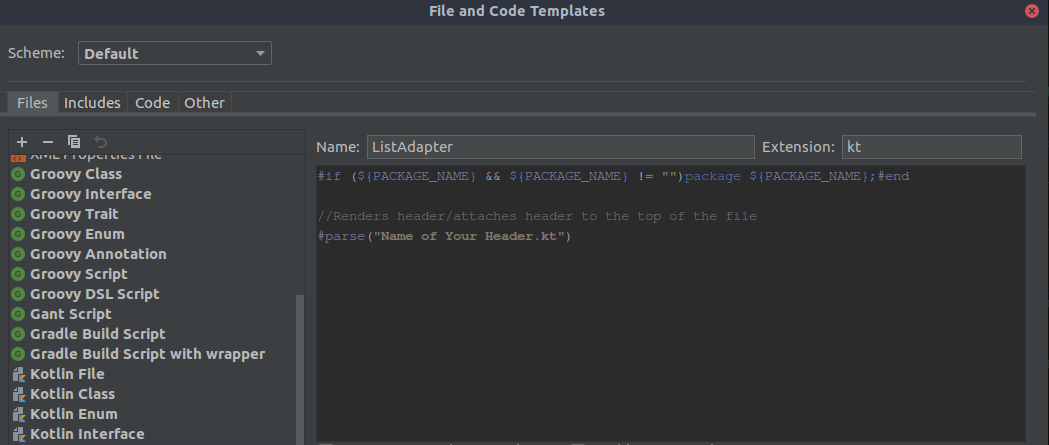
We can now start creating our template, we will use a couple of predefined variables such as $PACKAGE_NAME, name of the target package where the new class or interface file is created, and $NAME, representing the name of our list adapter class.
The templates are also written Velocity Template Language and come with a number of directives as well which we can use, but we'll only look at 2 of these; #end -denotes the end of a control structure. #parse - renders the template passed to it.
With this out of the way, we can set up our header section.
Next to set up the class
Since your class will be used under different scenarios we will have to create place holders and this is where custom variables come in. You can specify your own variables with #set directive or just use a variable name as we have been doing and Android Studio will prompt you to enter a value for that variable upon creation of your entity/class e.g ${ITEM},${VIEWHOLDER}
Let's check this out in action
Things to note:
- Provide Necessary Imports to Classes that make up the default configuration of your class/code.
- Imports to Generated classes such as the R class will have to be done after Template has been implemented.
- Provide TODOs on methods or functions that need custom handling and can't be templated.
To try out your custom template head over to the File > New > Name of template.
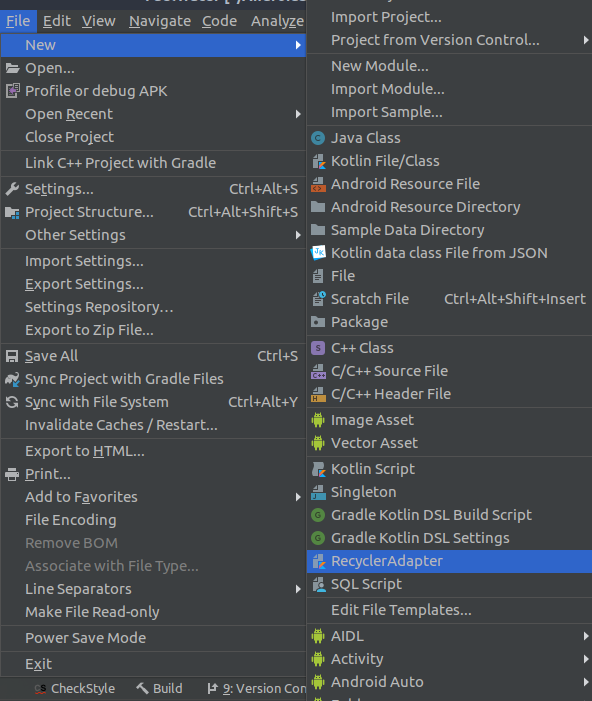
and a dialogue box will pop up asking you to fill in the values of your templates with a correlation to the custom variables you created.
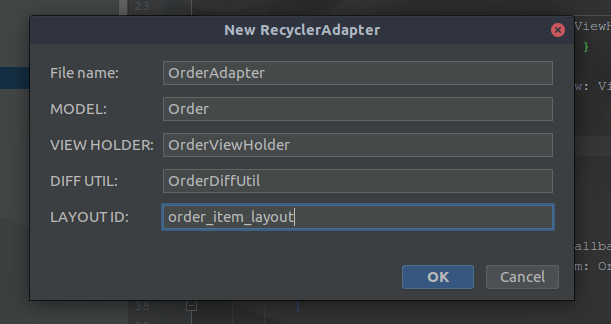
Template Implementation
and with that, you are all done and ready to save some time😃Feel free to reach out or if you have any questions on my socials.
Resources


